 Skip to content
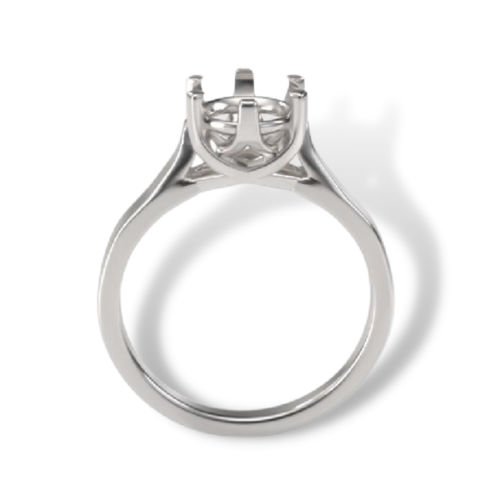
What is a Pre-notched Mounting?
A pre-notched mounting means that the prongs or claws that will hold the gemstone have already been cut or notched to a specific size/height and shape to fit a particular gemstone. This pre-cutting makes it easier and quicker for the jeweler to set the stone.
Benefits of pre-notched jewelry mountings include:
- Ease of Setting: For jewelers, especially those who may be less experienced, pre-notched mountings can simplify the stone-setting process. The notches provide a guide for where the stone should sit.
- Consistency: Pre-notched mountings offer a consistent look, especially when producing multiple pieces of the same design.
- Time Efficiency: Using pre-notched settings can save jewelers time, as they don’t have to manually notch each prong.
- Reduced Risk: Manually notching prongs can sometimes lead to errors, like cutting too deep or unevenly. Pre-notched mountings help reduce this risk.
However, it’s worth noting that while pre-notched mountings offer convenience, they may not be suitable for all gemstones or designs. Some custom or unique gemstone shapes might require a jeweler to manually adjust or notch the prongs for a perfect fit.
How to Use a Pre-notched Mounting
A pre-notched mounting offers a convenient way to set properly proportioned and calibrated gemstones, as the groove where the stone’s girdle rests is already prepared for you. This means your primary task is to secure the stone by bending the prongs. Here’s a step-by-step guide:
- Choose the Right Mounting: Start with rings or larger solitaire pendants, as their prongs are generally more robust than those on smaller mountings and you will have more to grip on the mounting.
- Position the Stone: Gently place your gemstone into the pre-notched mounting. Ensure the stone sits level within the mounting. To verify, hold the setting at eye level and rotate it, checking for evenness. Also check from the top/table of the stone to make sure it is not sitting crooked in the head of the mounting. The stone should fit comfortably without any force. Before bending the prongs over the stone, snug them against the stone to prevent any shifts. Use gem setting pliers: gently squeeze prong to prong (opposite sides, not side by side). Exercise caution to avoid damaging the gem.
- Secure the Stone: With the stone positioned evenly and level in the mounting head, maintain its position with your finger on the hand not using the pliers. Some prefer using their thumb others their index finger (this is a personal preference, do what feels comfortable for you). This ensures it remains stationary during the setting process.
- Set the Stone: Position your pliers at about a 45-degree angle to the stone, ensuring they point towards the stone’s center. Gently squeeze the pliers over a prong. Use minimal pressure and keep the stone steady. Start with one prong, then move to its opposite. Continue with the remaining prongs. Once all prongs are initially set, revisit the first prong to finalize its position, followed by its opposite, and so on.
- Final Check: Once all prongs are set, ensure it’s firmly in place. Look for gaps between the stone and prong notches (there should not be any gaps as the stone if it fits correctly should be snug with the metal) Make any necessary adjustments for a secure fit.
While the pre-notched mounting simplifies the process, it still will take practice to perfect, so expect a few mistakes especially if you are a beginner to setting jewelry. Feel free to reach out for additional tips or tricks!
How Our Pre-notched Mountings Differ from Others
Comparing Pre-notched Mountings: Our Superior Design
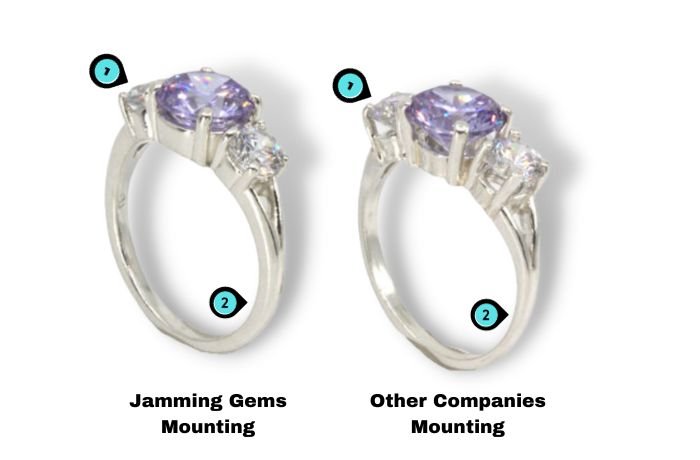
Through rigorous testing and refinement, we’ve enhanced the fit of our pre-notched mountings for standard, well-cut, calibrated gemstones. While the limitations of pre-notched mountings are well-known, it’s essential that your gemstone not only looks impeccably set but also remains securely in place. Below, we highlight the key differences between our mountings and those of competitors, as illustrated in the image above.
1. Stone Seating: In our design, gemstones sit nearly flush with the mounting’s head, which is the ideal and proper way to seat a gemstone. In contrast, our competitor’s design elevates the gemstones to such a height that the culet is almost visible from the mounting’s side, rising above the head rail. Also notice the visible gap between the stone and the prong base, which you might think would just let more light in, but it is only making it highly susceptible to knocking the stone loose and falling out or cracking it.
2. Durable Bands: Our bands are built to last. While our rings might come at a slightly higher price point than some competitors (though still more affordable than many others), the quality speaks for itself. Our bands are robust but still comfortable to wear, ensuring they won’t bend or warp with proper care and wear. This sturdiness also means you can polish and finish the mounting with confidence, without the fear of over thinning out the band.
In conclusion, our commitment to quality and precision ensures that your gemstone is not only beautifully showcased but also securely set for the long haul. Choose wisely; choose superior design.